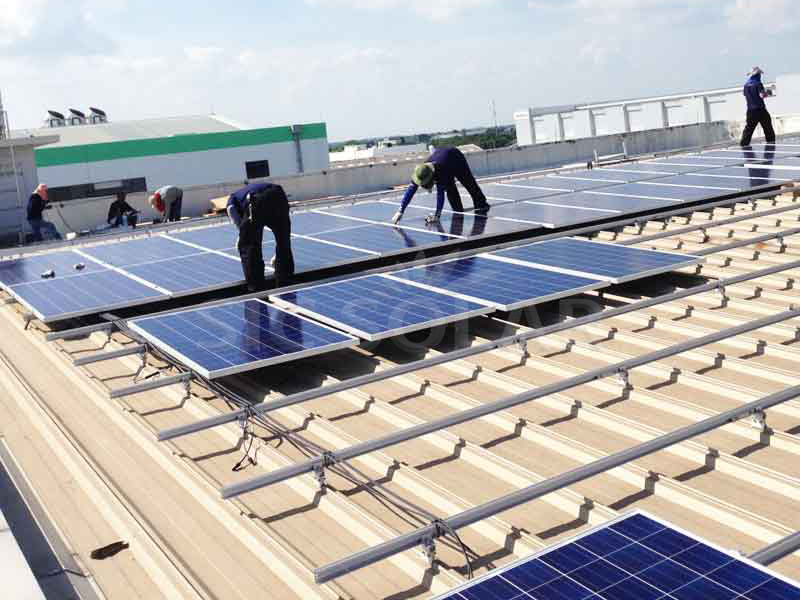
Mounting solar panels on a roof is essential for maximizing exposure to sunlight and ensuring system stability and longevity. But the installation process requires a careful selection of materials and methods to ensure panels stay secure and are properly aligned.
Step 1: Choosing the Right Mounting System
Different roof types require different mounting systems, each offering unique benefits for stability and longevity. The three main types of mounting options are:
- Roof-Direct Mounts: Direct attachment to the roof material, ideal for lightweight, flat-roof setups.
- Rails: A common choice for residential roofs; rails attach to the roof and provide a base for securing the panels.
- Ballasted Systems: For flat roofs where drilling into the surface isn’t feasible, weights hold the panels in place without penetrating the roof.
SIC Solar, a producer and supplier of photovoltaic mounting systems, specializes in various roof mounting solutions that fit a range of roof structures. They offer options that enhance stability, resist weather conditions, and ensure long-lasting performance with minimal maintenance.
Step 2: Preparing the Roof
Before any installation begins, the roof must be prepared to ensure safety and stability. This involves:
- Inspection: Checking the roof’s condition to verify it can support the weight of the panels and mounting equipment.
- Measuring and Layout: Accurate measurements are crucial to ensure that panels will be aligned and positioned optimally to capture sunlight.
- Safety Precautions: Ensuring a secure work environment by using safety harnesses and equipment is essential to avoid risks on rooftops.
Step 3: Attaching the Mounting Hardware
With the roof prepped, the next step is to attach the mounting hardware. The process varies based on the roof type but generally involves securing brackets or rails. Here’s how it works:
- Finding the Roof Joists: In residential settings, rails or brackets are attached to roof joists for stability. Mounting hardware is anchored to these structural elements to ensure a solid base.
- Installing Flashing: Waterproof flashing is essential for sealing around any drilled areas to prevent water leaks. This step is especially important for asphalt shingle and tiled roofs.
- Securing Mounts or Rails: Brackets or rails are then secured to the roof structure. SIC Solar mounting solutions include durable and corrosion-resistant materials that meet industry standards for safety and durability.
Step 4: Mounting the Solar Panels
Once the hardware is in place, panels are secured using clamps or clips that attach to the rails or mounting brackets. There are typically two types of clamps:
- Mid Clamps: Positioned between two solar panels, mid clamps secure the sides of each panel.
- End Clamps: Placed at the edges of the panel array to hold the outermost panels in place.
These clamps are designed to withstand high wind speeds and other environmental stresses, ensuring that panels remain securely fastened. SIC Solar mounting systems come equipped with robust clamps and fasteners that provide a strong grip while allowing for easy adjustments if necessary.
Step 5: Connecting the Electrical Components
After panels are securely mounted, electrical connections are made. This involves connecting the panels to each other and to the inverter, which converts the DC power from the panels into usable AC power for the home or building.
Proper cable management is key for maintaining a neat and secure setup. Cables are typically run along the rails and secured with clips or ties to keep them from moving or getting damaged. SIC Solar offers mounting options that accommodate cable management systems, keeping cables neatly organized and reducing maintenance needs.
Considerations for Different Roof Types
Each type of roof requires specific considerations to ensure a successful installation. Here’s a brief look at the mounting techniques for various roof materials:
- Asphalt Shingle Roofs: The most common residential roof type, asphalt shingles, can easily accommodate rails or direct mounts. Flashing is applied to prevent leaks, and the mounting hardware is anchored into the roof’s structural elements.
- Metal Roofs: Mounting on metal roofs can vary based on whether it’s a standing seam or corrugated metal. For standing seam roofs, clamps can secure directly to the seams without drilling. For corrugated metal, specialized brackets or rail systems provide stability.
- Tile Roofs: Tile roofs can be more complex due to the need to remove and replace tiles around the mounting area. Specialized mounts are often required to prevent tile damage. SIC Solar offers adaptable mounting solutions that can be customized to fit tiled roofs securely.
- Flat Roofs: Flat roofs commonly use ballasted mounts to avoid drilling. In some cases, low-profile rails are also an option, especially if a slight tilt is needed to optimize sunlight exposure.
Benefits of SIC Solar Mounting Systems
SIC Solar, a leader in solar mounting systems, provides a range of products designed to adapt to different roof types and environmental conditions. Here are some reasons why SIC Solar systems stand out:
- Corrosion Resistance: Made with high-quality materials like anodized aluminum and stainless steel, SIC Solar mounting systems resist corrosion, ensuring durability in various climates.
- Quick Installation: SIC Solar designs products with efficiency in mind, simplifying the installation process for both residential and commercial projects.
- Versatile Applications: Whether for shingle, tile, or metal roofs, SIC Solar systems offer flexibility, making it easier for installers to find a secure mounting solution that matches the roof’s requirements.
Why Mounting Matters
Proper mounting ensures that the solar panels function optimally and remain stable throughout their lifespan. A reliable mounting system also protects the roof by minimizing penetration points and reducing the risk of leaks. With innovations from companies like SIC Solar, homeowners and businesses alike benefit from mounting systems that deliver both security and ease of installation.