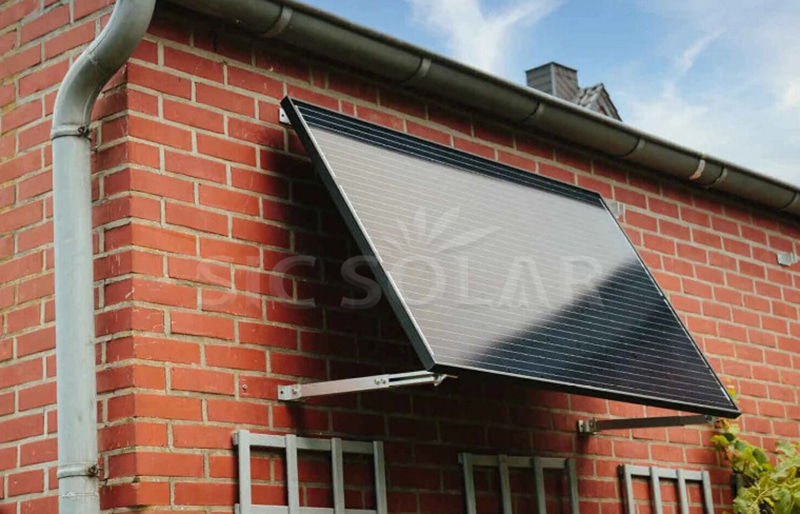
Mounting solar panels to walls has gained popularity, particularly in urban environments and for smaller, space-limited installations. Wall-mounted solar systems are a versatile and efficient way to capture solar energy without requiring roof space, and they can be a great addition for residential or commercial setups.
Attaching solar panels to a wall is beneficial in many situations, especially when roof space is limited, or the roof’s orientation doesn’t capture sunlight effectively. Wall-mounted systems can also provide:
- Energy Production Flexibility: Vertical or angled installations can help with winter sun capture, making it an effective solution in locations with lower sun angles.
- Space Efficiency: Wall-mounted systems maximize usable space, particularly on multi-story buildings, providing an alternative solution for solar installation without taking up valuable ground or roof area.
- Aesthetic and Architectural Integration: Solar panels can be seamlessly integrated into the building’s facade, contributing to a modern and eco-friendly aesthetic.
Key Considerations for Wall Mounted Solar Panels
Before attaching solar panels to a wall, it’s essential to consider the following factors to ensure a secure, efficient, and long-lasting installation:
- Wall Orientation and Sun Exposure: Choose a south-facing wall (or north-facing in the southern hemisphere) to capture maximum sunlight. An east- or west-facing wall may still work but will produce less energy.
- Angle and Tilt: While wall-mounted panels can be flat against the wall, tilting the panels to the optimal angle for your latitude will significantly improve their efficiency. This angle can be adjusted with the help of specialized mounting brackets.
- Building Material and Structural Integrity: The wall should be strong enough to bear the weight of the solar panels and mounting system. Reinforced concrete or masonry walls work best, as they provide the necessary support.
- Weather Conditions: Wall-mounted systems must endure wind, rain, and other environmental factors. Using weather-resistant materials and secure mounting solutions is essential to prevent damage over time.
Steps for Attaching a Solar Panel to a Wall
- Planning and Preparation
- Identify the best wall location that gets the maximum sunlight exposure and consider any shading from nearby structures or trees.
- Measure the available wall space and determine the number and size of solar panels needed to meet your energy needs.
- Selecting the Right Mounting System
- Choose a mounting bracket designed for wall installations. These brackets often have adjustable angles, which help to maximize sunlight capture.
- SIC Solar offers durable and adjustable mounting brackets suitable for wall installations, ensuring stable and secure attachment. Their products are corrosion-resistant and designed to withstand varying weather conditions, making them ideal for outdoor wall-mounted systems.
- Installing the Brackets
- Mark the locations for drilling holes based on the mounting bracket dimensions.
- Drill anchor holes in the wall using a masonry bit if attaching to concrete or brick.
- Securely attach the brackets to the wall using heavy-duty anchors and screws, ensuring they are level and properly aligned. Brackets should be spaced to evenly distribute the weight of each solar panel.
- Mounting the Solar Panels
- Once the brackets are attached, carefully lift the solar panel onto the brackets. Secure the panel to the brackets using bolts or clamps.
- SIC Solar mounting solutions include end clamps and mid clamps that hold panels firmly in place, providing a secure attachment for vertical surfaces like walls.
- Double-check all connections to ensure the panel is stable and secure.
- Wiring and Connections
- After mounting the panels, connect them to the inverter and the electrical system. Ensure all wiring is properly insulated and secured to the wall, using cable clips or conduit to keep wires neatly arranged.
- Properly ground the system as required to ensure safety and comply with electrical codes.
- Testing and Inspection
- Test the solar panel system to ensure it’s generating power correctly. Inspect all connections and attachments to confirm they are secure.
- Schedule periodic inspections, especially if the panels are in an area exposed to heavy wind or other extreme weather conditions.
How SIC Solar Supports Wall Mounted Solar Installations
SIC Solar, a leading provider of photovoltaic mounting systems, offers a range of mounting solutions that suit various applications, including wall-mounted systems. Here’s how SIC Solar products benefit wall-mounted installations:
- Durable Materials: SIC Solar brackets and clamps are made from corrosion-resistant materials, such as anodized aluminum and stainless steel, to endure outdoor conditions.
- Adjustable Brackets: Their wall-mount brackets come with adjustable tilt options, enabling users to set the ideal angle for solar capture, which is especially beneficial for walls that don’t face directly south or north.
- Secure Clamping: SIC Solar end and mid clamps provide firm panel support, ensuring stability and security for vertical installations.
- Flexible Solutions: SIC Solar mounting systems can be adapted for a variety of surfaces and sizes, making them suitable for everything from single-panel residential installations to larger commercial projects.

Attaching solar panels to a wall is an effective solution for generating renewable energy, especially in spaces where traditional roof installations aren’t possible. By following the right installation steps and using high-quality mounting systems like those offered by SIC Solar, you can enjoy a stable and efficient wall-mounted solar system that maximizes your building’s potential for energy production.